Are you wondering what ravbg64 Skype error is on your computer? On a Windows system, RAVBg64.exe is a service that sometimes consumes too much of your CPU resources, causing your computer to slow down. This is an essential Windows component but causes errors like the RAVBg64 Skype error. RAVBg64.exe is an in-built automatic service that helps you in connecting communicating apps and software.
There are times when there might be a pop-up stating that RAVBg is trying to access your contacts, this error is called the RAVBg64 Skype error.
Contents
- What Is Skype?
- What is the RAVBg64.exe?
- Why Does RAVBg64.exe Request Skype Access?
- What If RAVBg64.exe Keeps Requesting Even After Allowing it?
- Solution #1. Update Skype
- Solution #2. Reinstall Skype
- Solution #3. Reset Skype Settings
- Solution #4. Change Skype’s Settings
- Ravbg64 Skype Error FAQs
- Is Skype free?
- Can I use Skype with WIFI access?
- What is RAVBg64 EXE?
- What is the HD audio background process?
- How do I fix the Realtek HD Audio Manager missing in Windows 10?
- Does Realtek HD Audio Manager need to run at startup?
- Is Realtek audio good?
- Can I disable Realtek HD Audio Manager?
- Relevant Guides And Fixes:
What Is Skype?
Skype is a communication app that comes with the Microsoft Office package. It is used to connect with our friends, family, and business partners. The main reason why we use Skype on Windows is to have access to contacts easily and communicate with people on a daily basis. If you purchase a Microsoft subscription that includes Skype, you can use the application on your laptop or desktop.
You can Skype to send documents, photos, audio, etc to your contacts, and you can also make a group to communicate with multiple members at once. Skype provides quality video and audio calls to its users.
And when you are sending a voice message through Skype or doing an audio call, it accesses your computer’s RAVBg64.exe. That’s where RAVBg64 Skype Error occurs when your Realtek Audio-Video Background is faulty.
What is the RAVBg64.exe?
The RavBG64.exe is not a virus. It is related to the Realtek Audio Drivers, which helps your audio drivers work properly on your computer. This audio driver permits your Skype software to record audio and videos on your Windows computer.
If this driver does not work properly, then you won’t be able to communicate through apps like Skype.
That’s why whenever you open Skype, it requests your RAVBG64.exe access. Everything when you access the video and audio feature of your Skype software, the RAVBG64.exe, runs in your background. When there is a problem with the driver, the application shows the Skype wants to use RAVBg64.exe on Windows 10. The recent update of Skype eliminated the RAVBg64 Skype error, but some users are still experiencing it.
You can perform a few methods on the new Skype version to eliminate RAVBg64 Skype error. But if the methods still don’t solve your problem, then you will have to wait until Skype rolls out its next update.
Why Does RAVBg64.exe Request Skype Access?
When starting Skype, some users find the RAVBg64.exe Skype access request. The executable file is a part of your device’s audio drivers. Skype is an application where you can chat with users over audio and video calls and record audio clips. Hence, it is normal for the application to request RAVBg64 access. In the latest update of Skype, the RAVBg64 Skype error is fixed.
Though, some people still encounter it once in a while. Even if you don’t grant permission, you can still use Skype. However, you will see the error on your screen every time you boot up the communication app. This will continue till you grant access for RAVBg64.exe Request Skype. Once you allow the Windows component to access Skype, the pop-up won’t appear again.
What If RAVBg64.exe Keeps Requesting Even After Allowing it?
Sometimes, even if you allow the RAVBg64.exe access, Skype does not stop showing the same prompt. If the prompt does not go away, you can perform the following steps:
- Open Skype
- Click on Tools
- Click Options
- Go to Advanced settings
- From the bottom of the Window, click on Manage other programs’ access to Skype
- Select the executable file and click on Change
- Select Do Not Allow and press Ok
- Click on the .exe again and press Change again
- Click on Allow and press Ok
- Finally, click Ok and Save
After doing this process, you won’t see the Skype error anymore.
Solution #1. Update Skype
All applications show bugs and glitches from time to time. And Skype is also an application. If you constantly see the error telling RAVBg64.exe is trying to access Skype, update the software. Most bugs are resolvable after the update, so if you have a “RAVBg64 Skype error” problem before updating the software, update it first. Updating Skype will resolve most of the errors.

Solution #2. Reinstall Skype
1. Close your Skype completely
2. Then open your Settings app by quickly pressing Windows Key + I on your keyboard
3. Go to the Apps tab
4. Here, you will find a list of all installed applications

5. Click on Skype and click on Uninstall

6. Follow the on-screen instructions to remove the application
After removing it, you will have to install the latest version of the app again. After reinstalling, the problem won’t last anymore.
Solution #3. Reset Skype Settings
1. Close Skype entirely and open Task Manager by pressing Windows Key + R
2. Type %appdata% in the empty box and press Enter or click OK

3. Locate the Skype directory and right-click on it
4. Choose Rename and rename it to Skype_old

5. Then start Skype again after changing the name
Resetting your Skype will remove all your chat histories, but you always retrieve them. Restore your old conversations by copying them from the Skype_old directory.
Solution #4. Change Skype’s Settings
- Open the Skype application.
- Click on Tools > Options
- Click on Advanced settings from the left pane
- From the right, click Manage other programs’ access to Skype
- Select RavBG64.exe in the list and click on Change
- Select Allow, click on OK
- Choose OK and click on Save

After performing these steps, the error should disappear permanently. The RavBG64.exe error is not that serious, and you can get rid of it quickly.
Ravbg64 Skype Error FAQs
Is Skype free?
Can I use Skype with WIFI access?
What is RAVBg64 EXE?
What is the HD audio background process?
HD Audio Background Process is Realtek’s ravbg64.exe file.
How do I fix the Realtek HD Audio Manager missing in Windows 10?
You can restore the Realtek HD Audio Manager icon to the system tray by enabling the startup in Task Manager. Follow these steps-
1. User shortcut keys Ctrl + Shift + Esc to open Task Manager.
2. Select the Startup tab.
3. If the Status of Realtek HD Audio Manager is Disable, you can right-click it and select the ‘Enable’.
4. Restart the computer.
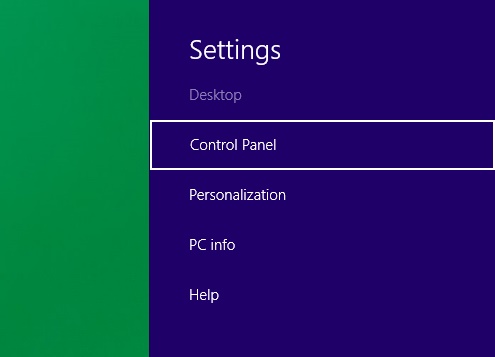
You can also go to the Control Panel to launch your Realtek HD Audio Manager on Windows 10, and here’s how to make it:
- Open Control Panel on your Windows 10.
- Change the View to Small/Large icons.
- Navigate to Realtek HD Audio Manager and click it.
- Click the “i” (information icon) above the OK button on the bottom right corner.
- Check the Display icon in the notification area option.
- Click the OK.
- Then you’ll find the Realtek HD Audio Manager icon appear on the taskbar. You can manage the sound settings as before.
Does Realtek HD Audio Manager need to run at startup?
No, the HD Audio manager is not necessary. You can switch it off and it’ll still not cause any problems.
Is Realtek audio good?
Realtek sound cards are really good, especially the Realtek 892 and 887.
Can I disable Realtek HD Audio Manager?
Yes, you can do so by following the steps given below-
- Type Device Manager in the search bar.
- Select Device Manager.
- Expand sound, video and game controllers.
- Right click on “High Definition Audio Device” and select Disable.